Here's a step-by-step guide to adding and managing your withdrawal addresses in your Bybit EU account.
Add Your Withdrawal Addresses
Manage Your Withdrawal Addresses
Adjust Your Withdrawal Settings
Verify Your Withdrawal Addresses
Delete Your Withdrawal Addresses
Important Notes:
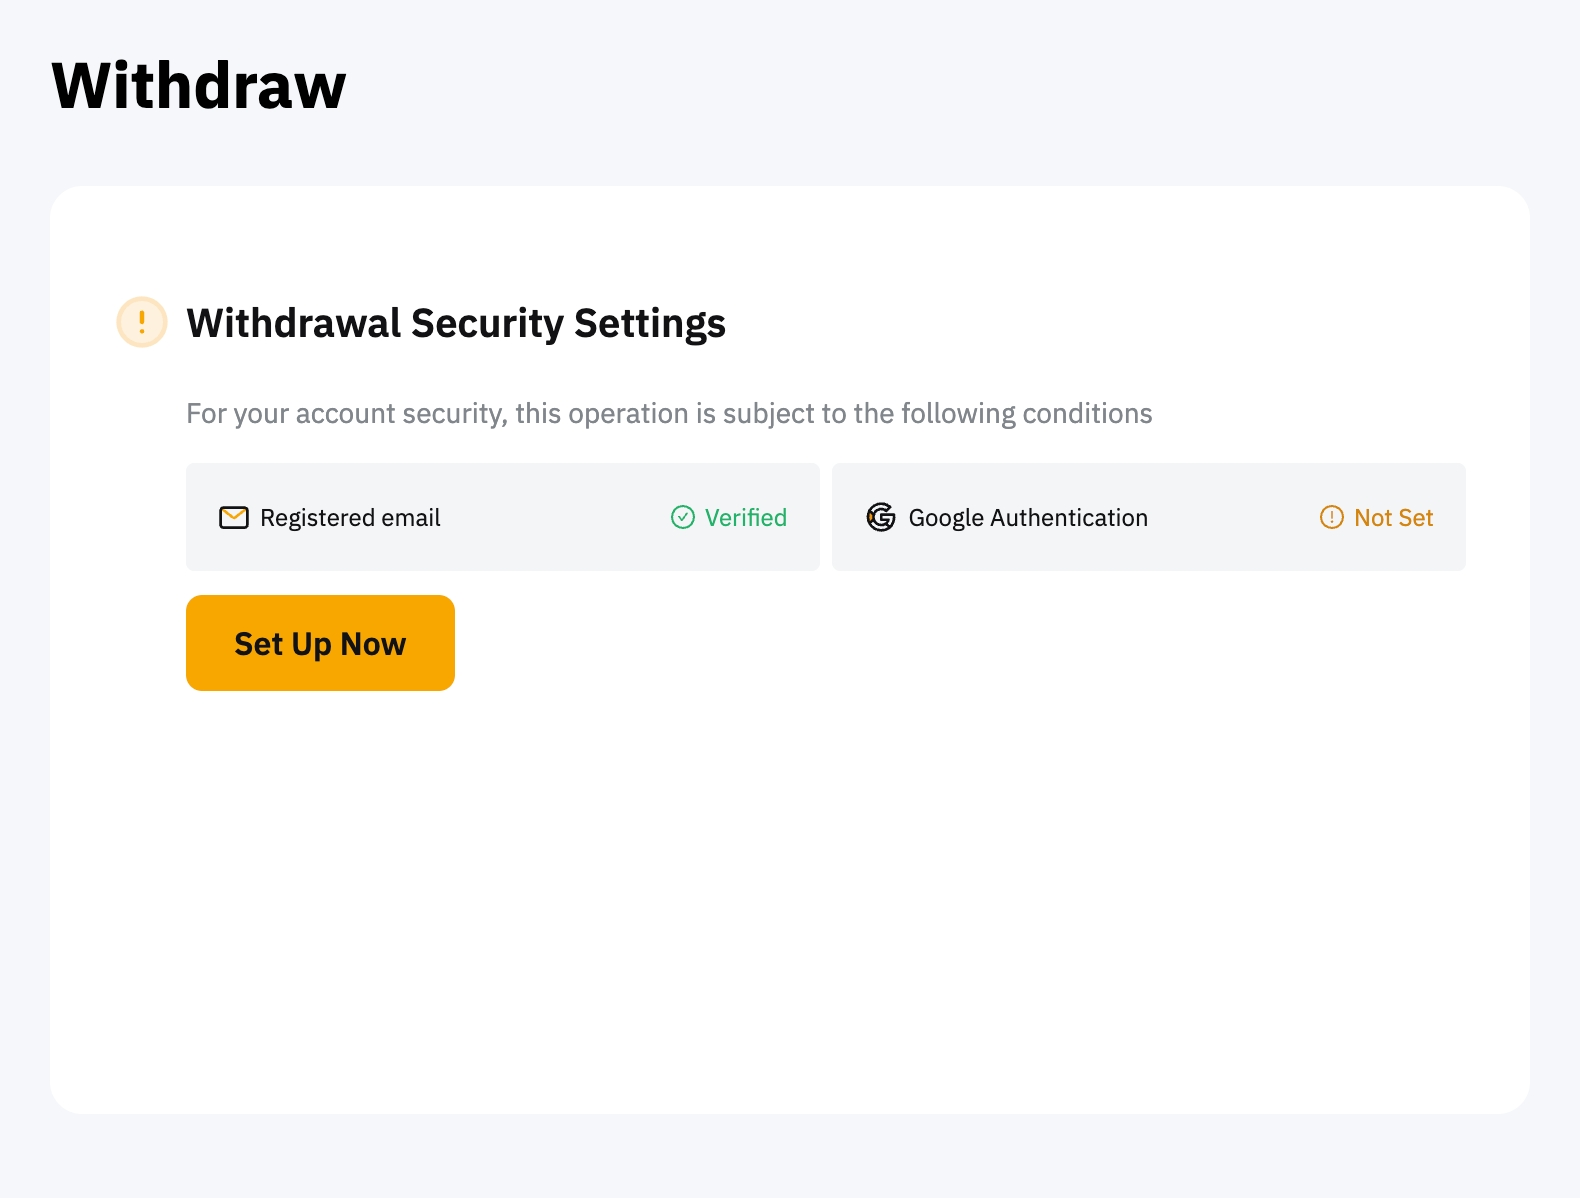
- Before you can proceed to add and manage your wallet addresses, you’ll need to set up Google Two Factor Authentication for your Bybit EU account.
- For the withdrawal of coins that require a tag/memo (e.g., XRP, A, XYM, XLM, XEM, and others), please remember to enter your Tag or Memo for the transfer. Failure to do so will cause unnecessary delays in processing your withdrawal.
Add Your Withdrawal Addresses
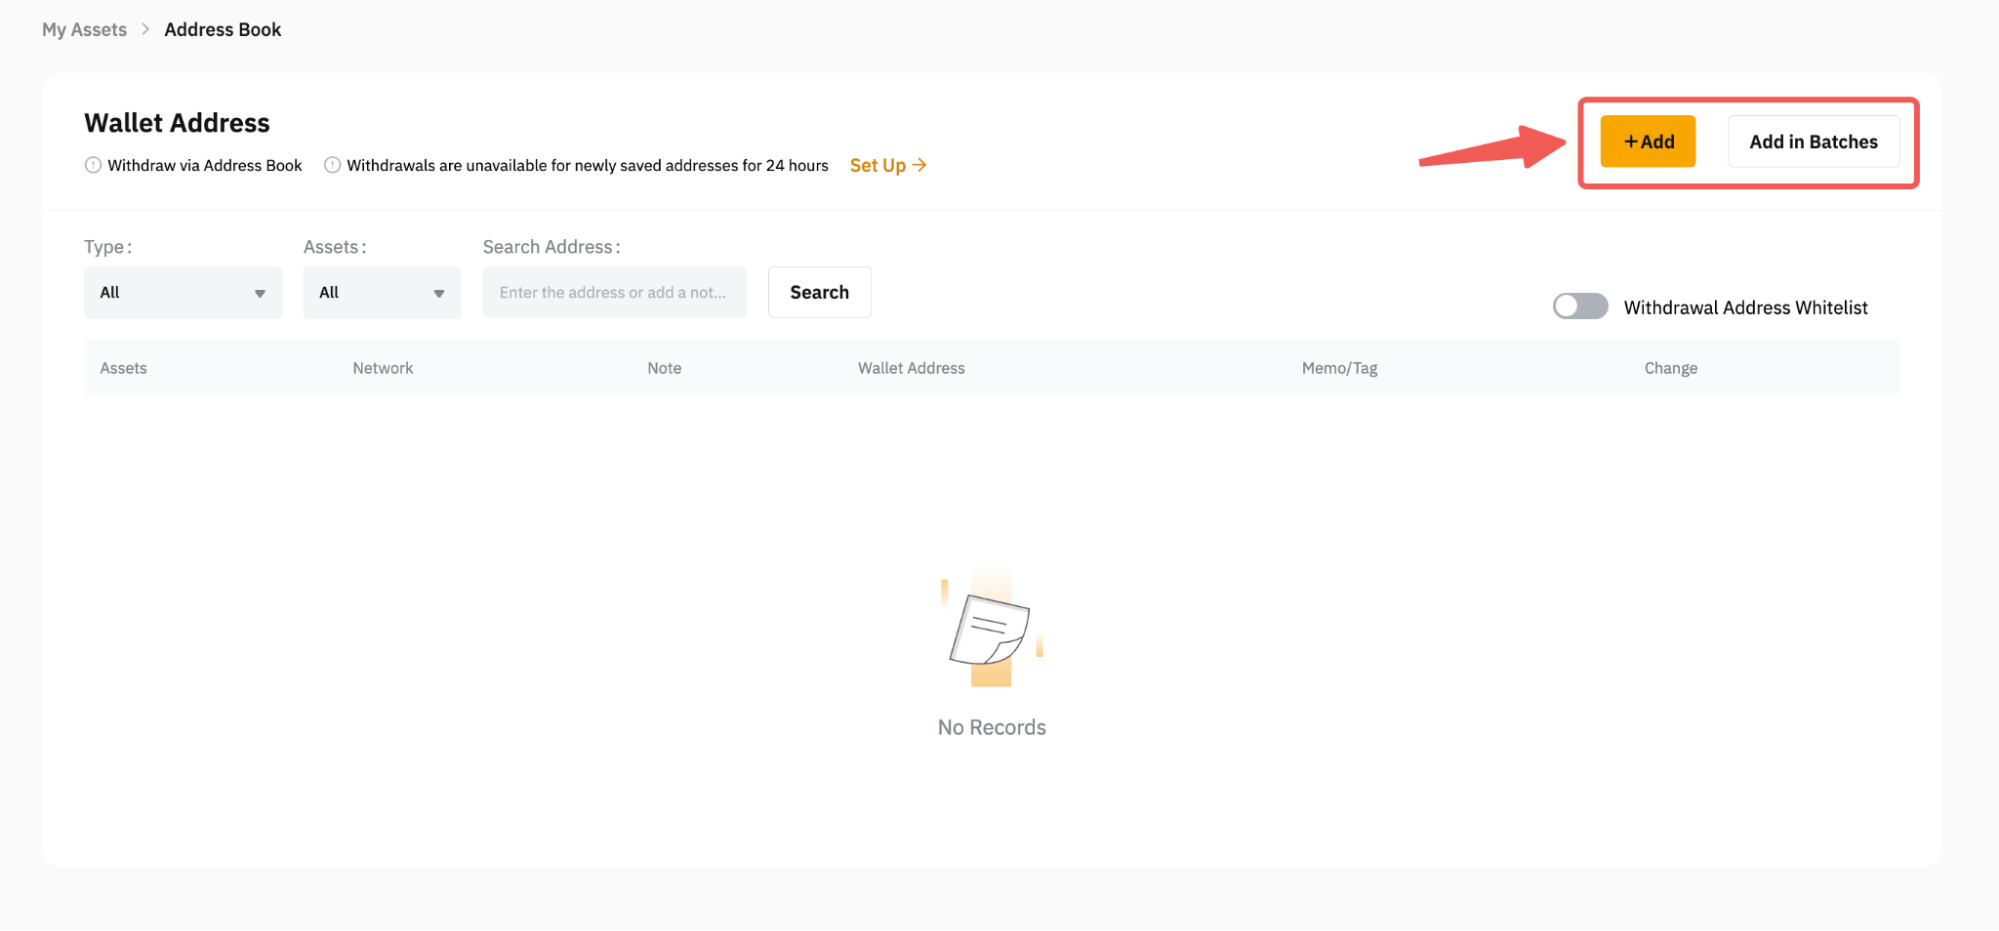
Step 1: Go to your wallet management page here or click on Manage Withdrawal Addresses on the Account page.
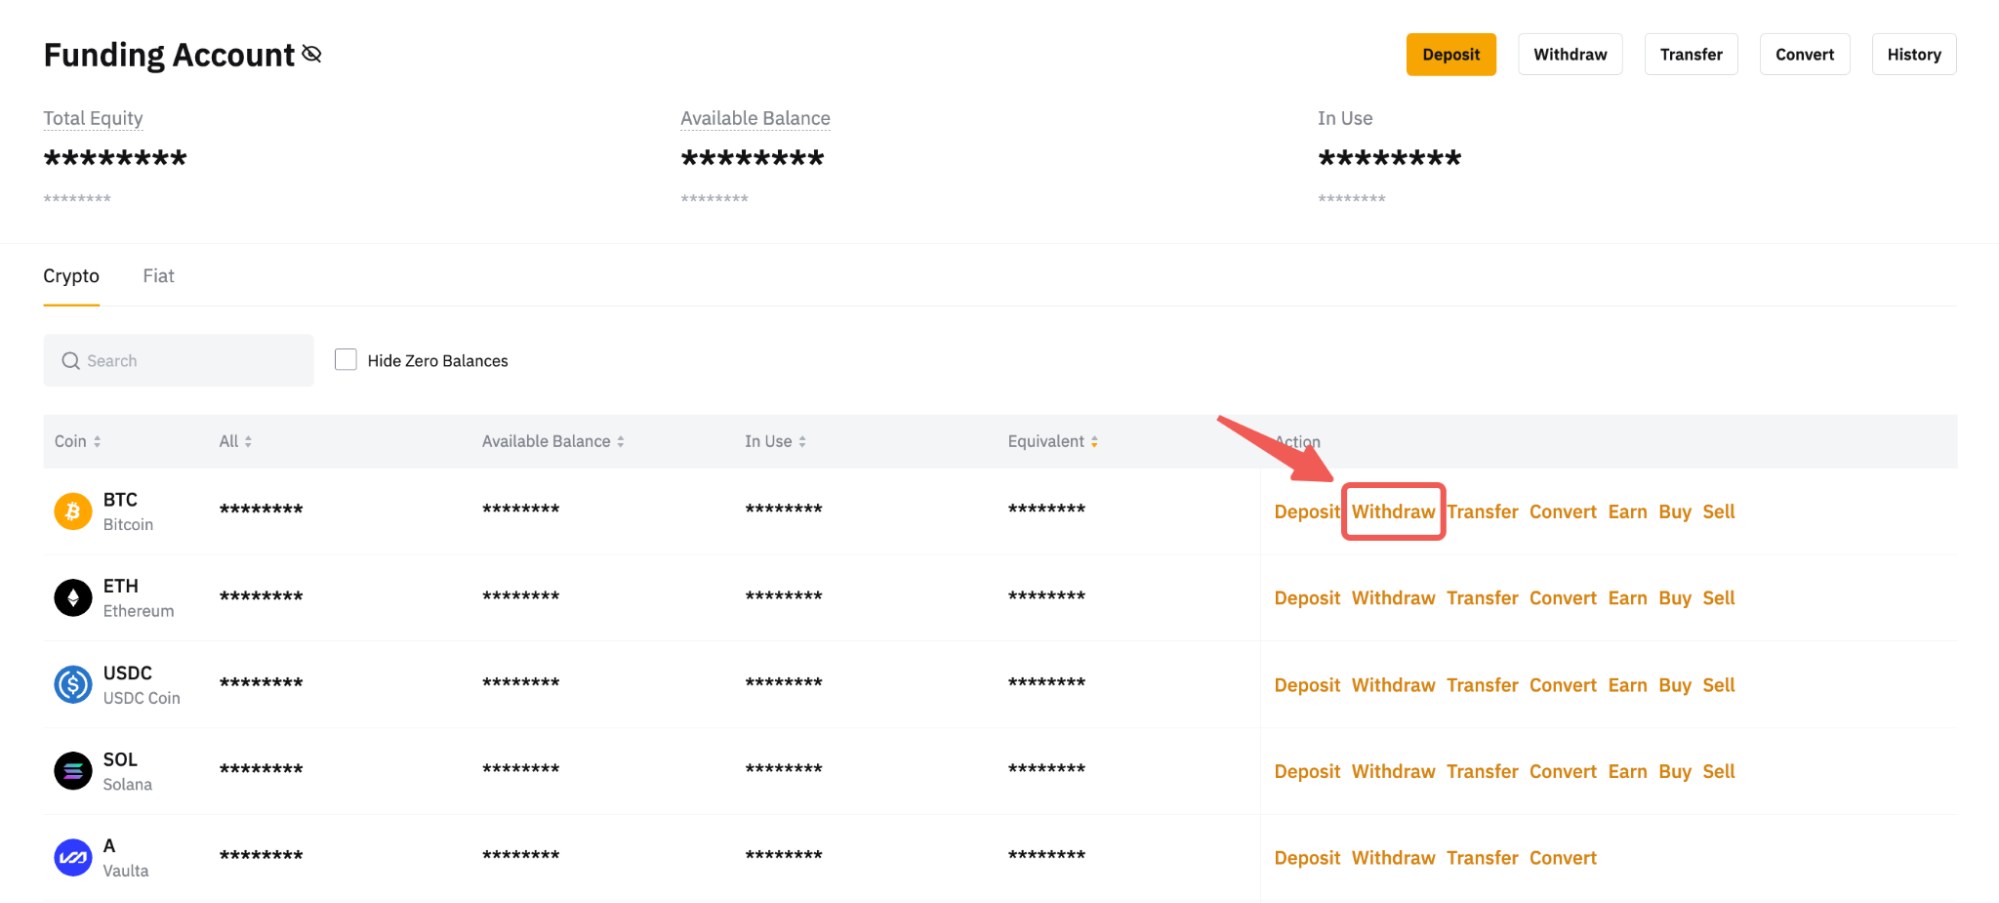
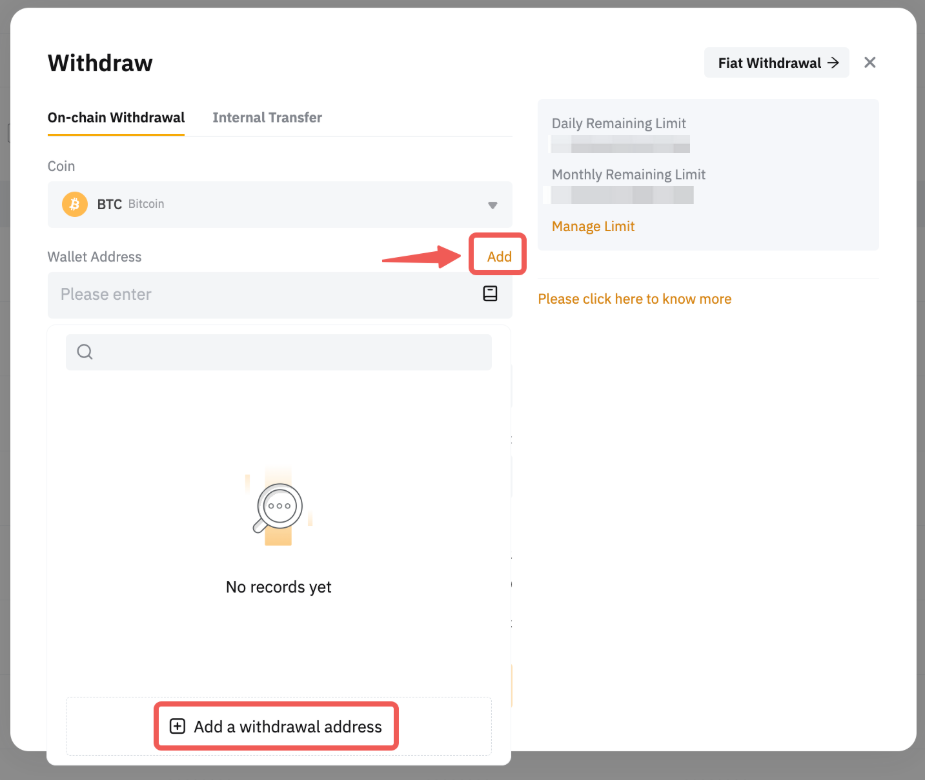
Alternatively, you can also click on Assets at the top right-hand corner of the home page and go to your Funding Account. Then, click on Withdraw in the column of the coin for which you wish to add the wallet address.
Step 2:
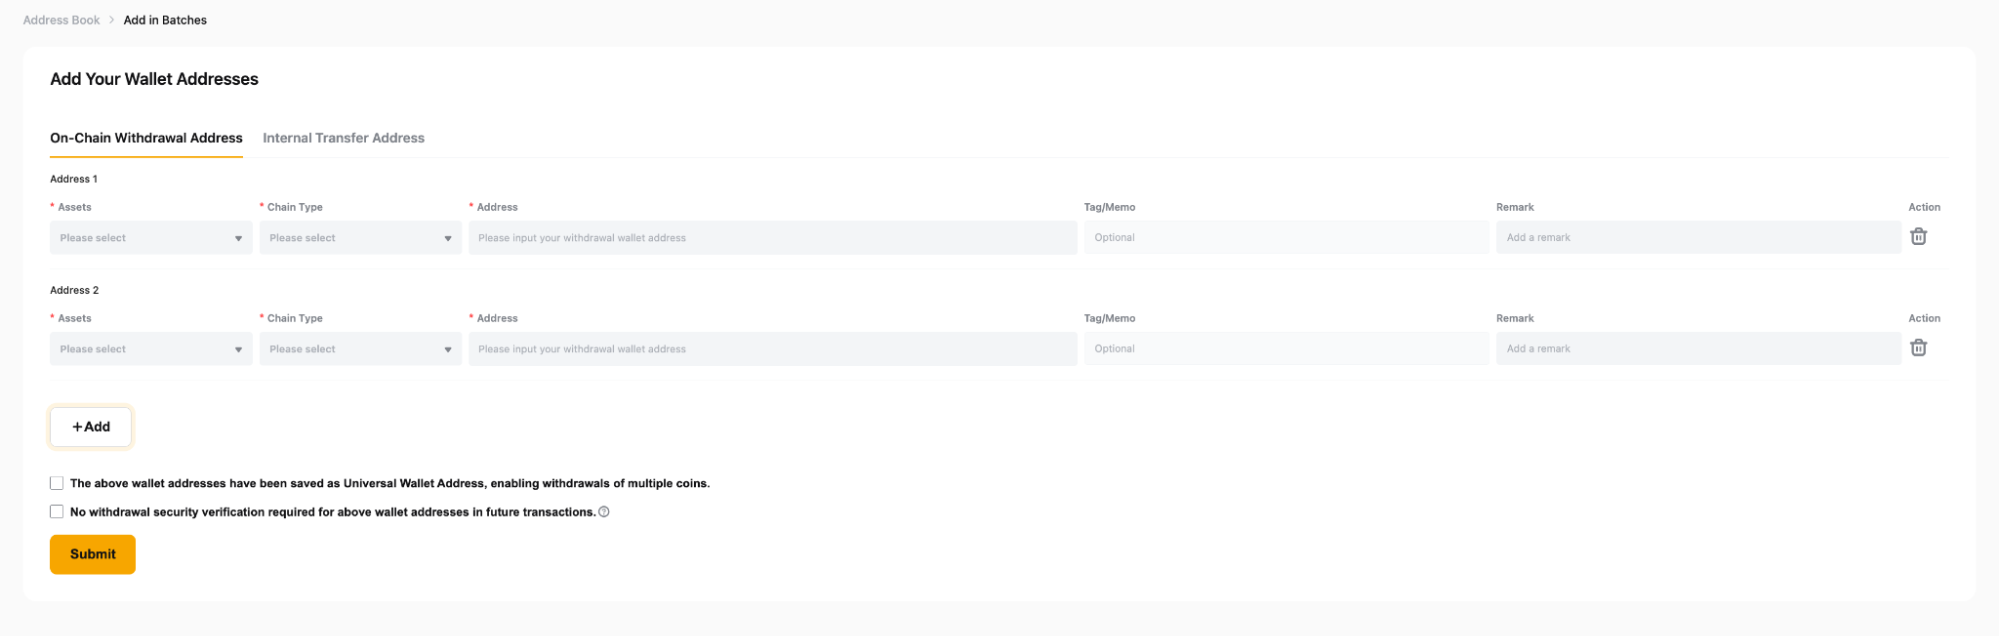
a. Once you’re on the Wallet Management page, please click on the Add button at the top right corner of the page to add a new wallet address. If you would like to add several addresses at the same time, please click on Add in Batches.
b. If you’re on the Funding Assets page, the withdrawal window will pop up after clicking on Withdraw. Please click on the Add button to be redirected to the Wallet Management page.
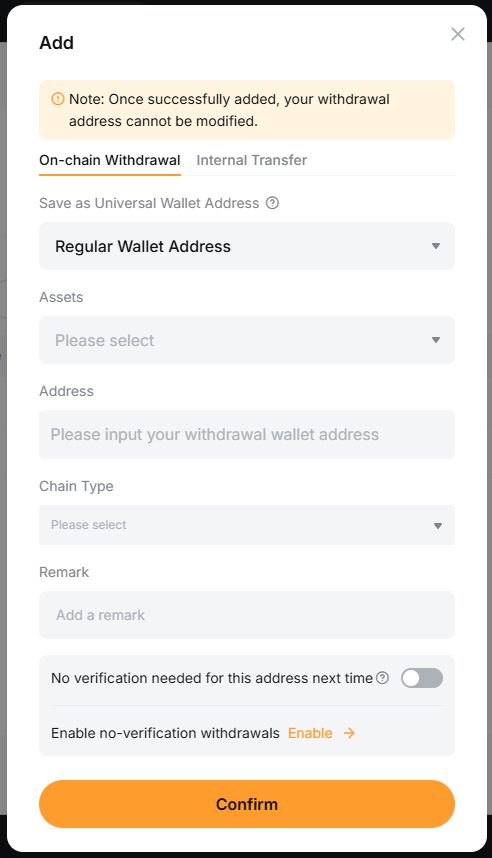
Step 3: Fill in your withdrawal wallet address details. The following information is required:
Once you’re done, click on Confirm.
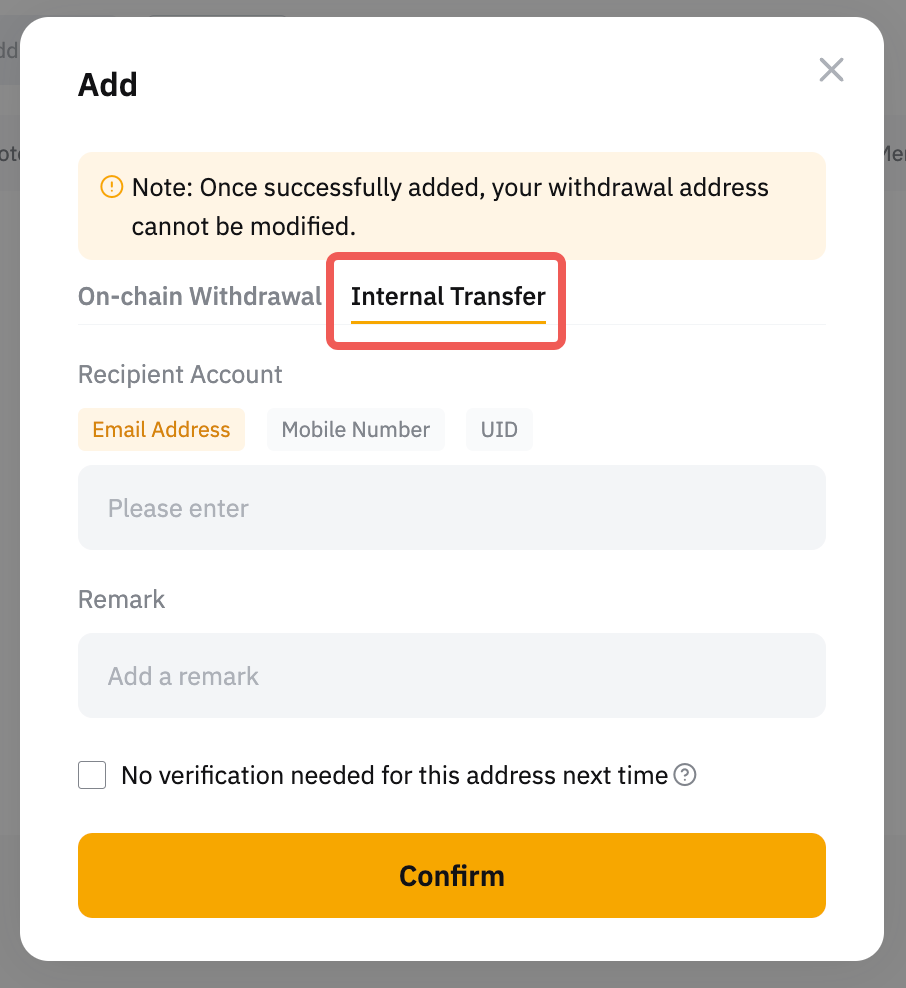
If you would like to add an Internal Transfer account, simply enter your email address, mobile number, or UID of the Bybit EU account to which you would like to withdraw.
If you would like to add wallet addresses in batches for on-chain withdrawal address and internal transfer address, please take note of the following:
- You can click on the Add button to add another wallet address, with a maximum of up to ten (10) addresses per batch.
- If you would like to remove a wallet address from the batch, kindly click on the rubbish bin icon under the Action column.
- Check the box below if you want to enable the Saved as Universal Wallet Address or No verification needed for this address next time function. However, please take note that the security verification might also be required if there is any unusual activity detected on your account.
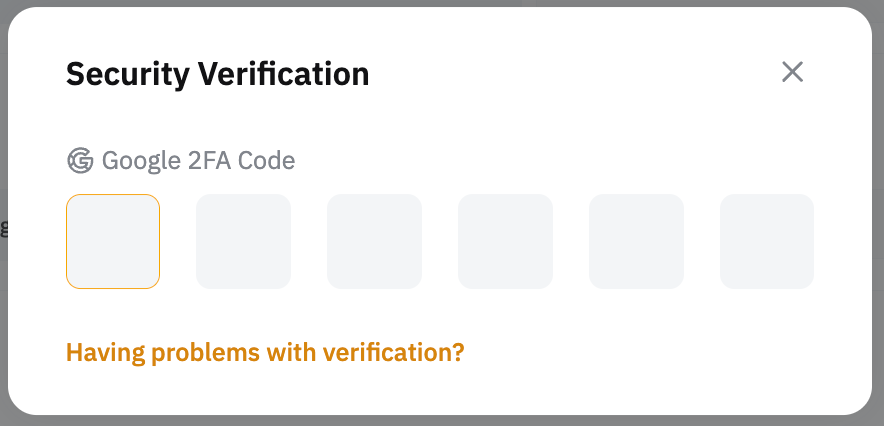
Step 4: If you haven't completed the verification steps, please do so to add the address to your address book.
Your wallet address has been added to your address book!

Manage Your Withdrawal Addresses
For swift and convenient withdrawals, Bybit EU has several security features to help you maintain and update your withdrawal address book. These features give you the options to adjust your current withdrawal settings as well as verify and delete any withdrawal addresses, if needed.
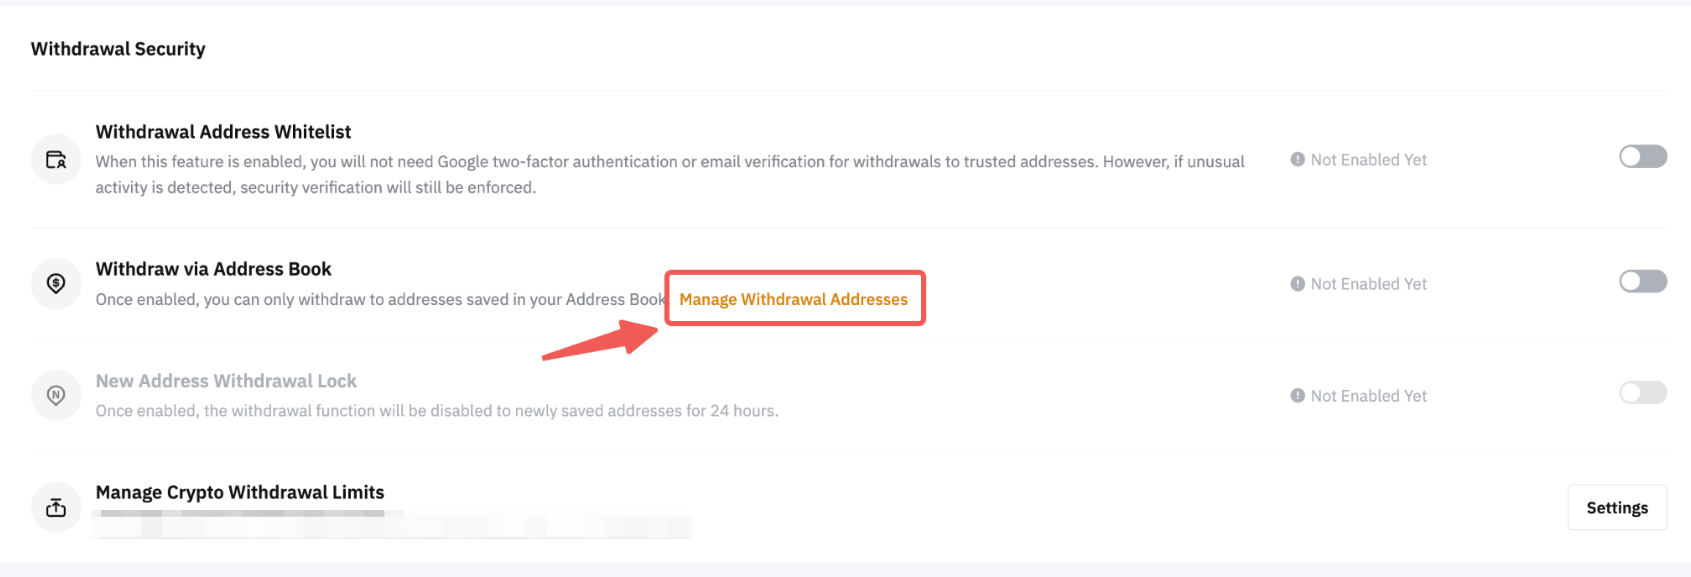
Adjust Your Withdrawal Settings
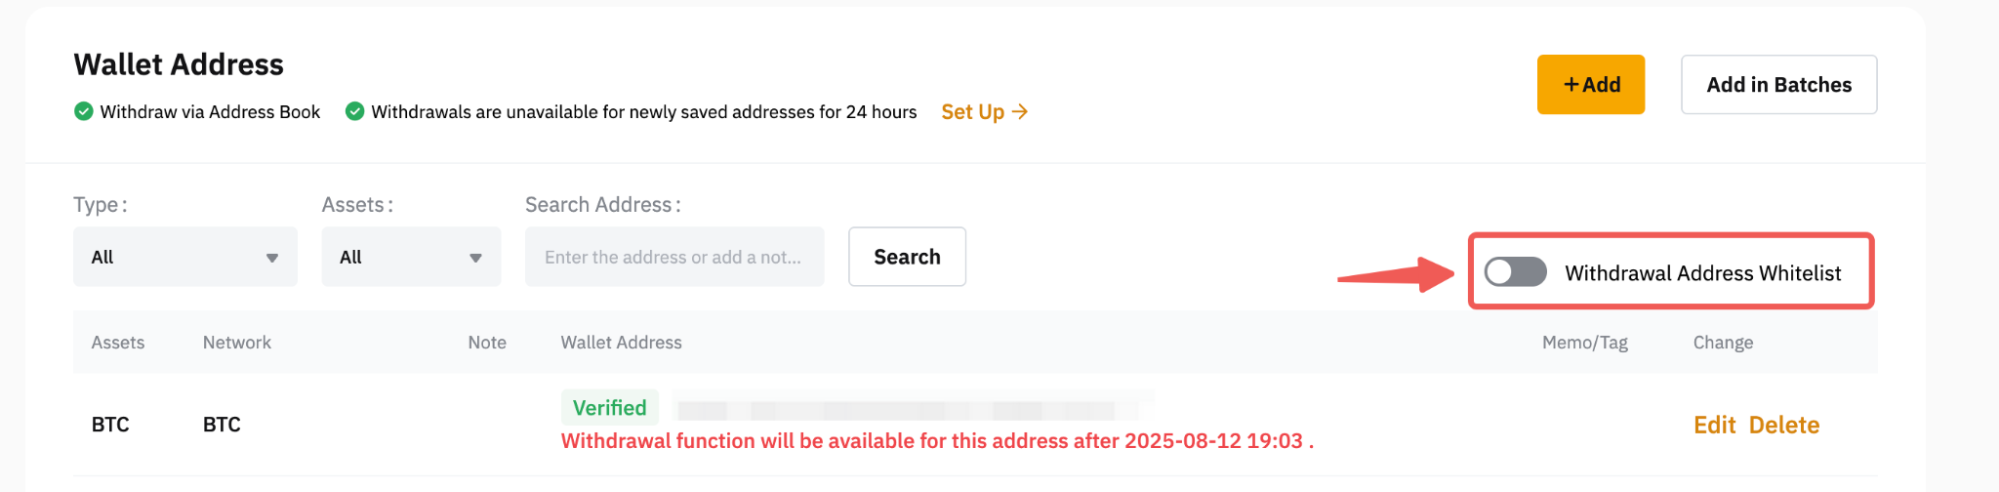
You can access and modify your withdrawal settings via the Wallet Management page by clicking on the Set Up button. You will then be redirected to the withdrawal security functions on the Account page, where you can toggle the options you would like to enable or disable.

If you have activated the New Address Withdrawal Lock security feature, for example, the withdrawal function will be restricted for 24 hours for the newly saved address or when you disable the security feature.

For more information on how to manage your withdrawal address book, please refer to this article.
Verify Your Withdrawal Addresses
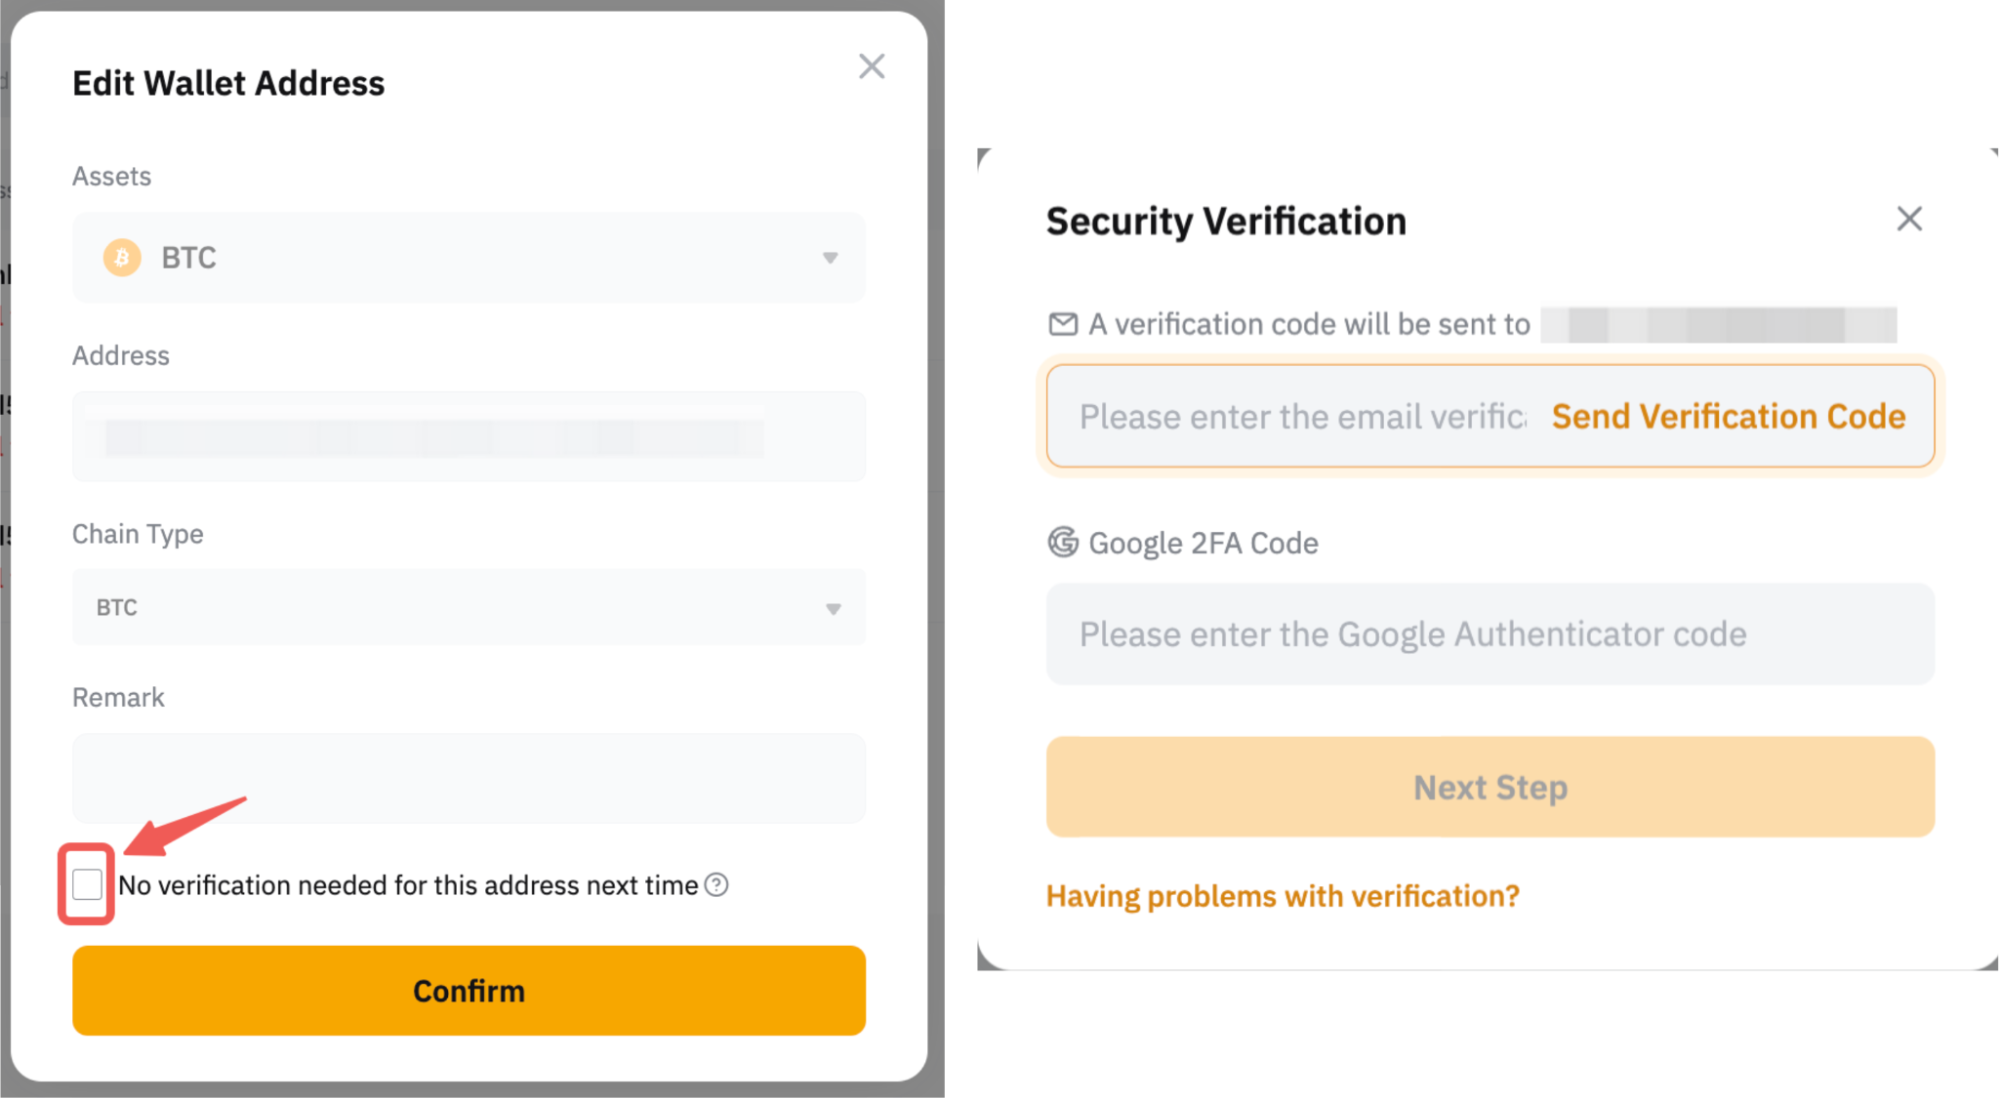
You can verify a withdrawal address even after it has already been added, and vice versa. To do so, click on Edit, then tick or untick the No verification needed for this address next time option at the bottom of the pop-up window.
Complete the security verification, and the verified status will be updated accordingly in the address book.

Once the withdrawal address has been verified, you can whitelist the address by toggling the Withdrawal Address Whitelist option. Doing so will allow you to make a withdrawal without having to complete the email and 2FA security verification process.
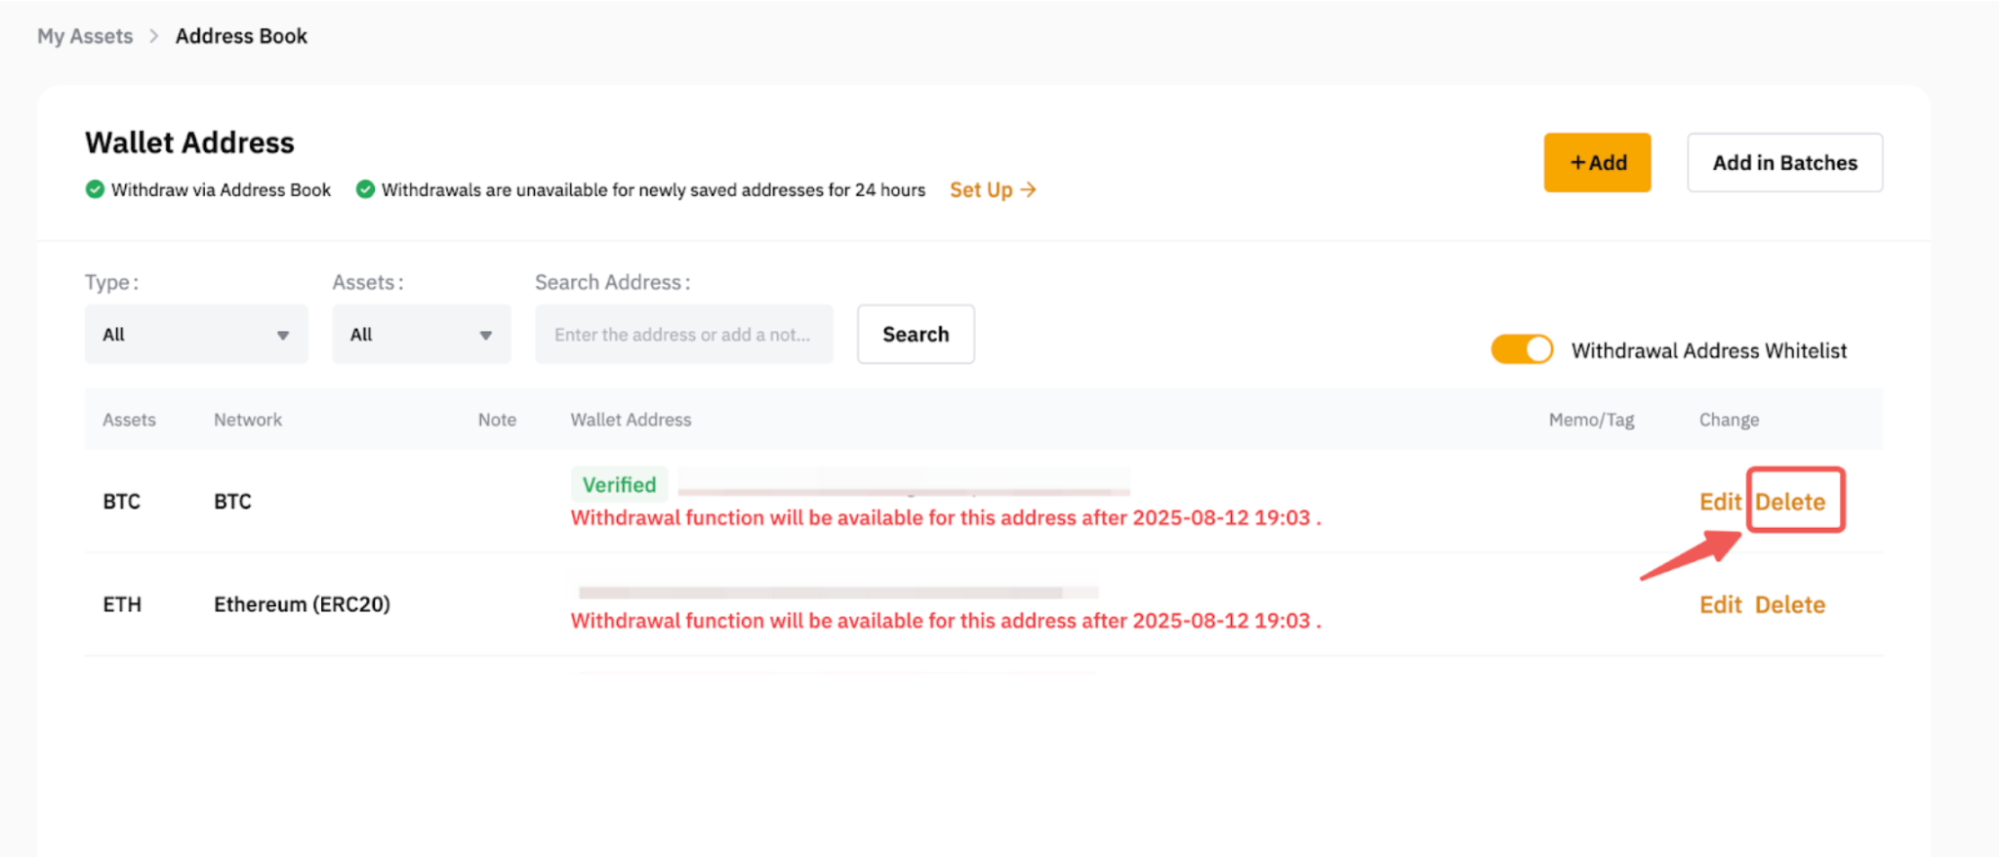
Delete Your Withdrawal Addresses
To remove any of the saved addresses from your address book, click on the Delete button in the available column of the respective address.